Disney Food Blog contributor Megan Dorsey offered a few food photography tips she’d learned from taking pics on a recent trip, and I thought it’d be fun to compile a few more from some photographer friends and me! More and more folks are starting to join the weird crowd of us who take photos of everything we eat, so tips and tricks are always fun to share!
The following tips are compiled from Megan, Anna G. who writes Cookie Madness, Joe S. from Culinary in the Country, my Dad (a professional photographer), and me!:
1. Play around with camera angles: While taking photos directly above the plate looking down works well for many entrees and shows the whole plate, some foods are more impressive when seen from the side. Experiment with different angles (makes it harder to keep us, the kids, and the other table stuff out of some shots.)
2. Try to clear away the rest of the table clutter from the shot. (Hard with two kids.)
3. Have the camera ready because it is tempting to start eating before you take the picture. If the camera is on the table it serves as a reminder to take the picture first.
4. Play with settings. I have a cuisine setting on my camera, which helped most of the time. Especially with light colored foods, I had to adjust settings (flash on or off) to try to get the best shot.
If you have a setting for incandescent light on your camera, you may want to turn that on (if you’re not using flash) to improve the color if the restaurant is lit with incandescent or quartz lighting.
If the food is plated on a white plate and your picture looks too dark, you may want to try using the camera setting for “beach” shots to prevent too dark a shot as the white plate overpowers the camera’s exposure setting. If it’s on a darker plate and the picture looks “washed out,” you may want to try the setting for nighttime shots (usually has a moon and stars).
5. Book reservations for daylight hours and ask for a table by the window. Your food will always photograph better in natural light. If it’s a cloudy day, hold up a white piece of paper in front of your the food to reflect the light back onto it! If you’re taking photos of food at home but you don’t have a room with nice, natural light, you can buy a daylight lamp like the Lowell Ego Light. A lot of food bloggers use these type of lights and they are great. You can buy two, or you can use one and set a white board across from it to reflect light.
6. Take more than one photo. Even though what you see in your viewfinder or on the LCD screen looks fantastic, it will look different when it’s blown up to scale on your computer screen. In the same way that you never knew what you’d find when you developed a roll of film back in the day, you never really know which digital pics will steal your heart until you see them full-size!
7. Remember that part of the fun of photographing food is showing the viewer what it’s like to EAT that item! If you’re taking pictures of a pastry, a sandwich, or something else that has a hidden “filling,” do a cross-section so that people get a better idea of what the full experience of eating that item could be.
8. In darker settings — which many Disney restaurants happen to be — you’re going too have to play with lighting and timing settings on your camera to make the photo viewable and useful to your audience. Learn about the ISO, exposure, and aperture settings on your camera so that you’ll be able to make better choices. Then practice!
Use a high ISO setting or flash to avoid long exposures (on point and shoot cameras) that might smear the picture. Another option is to use a small tripod (see number 10 below). One problem in using a tripod is that it is easy to move the camera as you push the button to take the picture. One simple way to prevent this is to set the camera to delay taking the picture for 5 or 10 seconds (whatever setting it has). By doing this, you can push the button and then take your hands off the camera until after the picture is taken assuring that there is no movement during the shot.
9. Keep it simple. A close-up shot of one food item will likely turn out better and be more attractive than a wide-angle shot of the whole table of food.
Two options for close-ups: Get up close and use your “macro” setting. This option may make it difficult for you or the camera to get everything in focus and if you are using flash, you may get extreme contrast which does not make food look all that appealing. Another option is to stay a ways away and zoom in on the plate. Since you are further away, differences in focus and light are relatively small compared to a “macro” shot and may give you a better result. Stay out of the “digital zoom” range if you can, because the picture will get grainy.
10. Consider a tripod. Now, I don’t mean lugging a telescoping-leg thing around the parks. Grab a “gorillapod” and stick it in your backpack or camera case. This will make it much easier to take non-blurry shots in darker surroundings!
11. The auto focus on some cameras may have difficulty focusing on some foods (a bowl of soup for example). If you have this problem, give the camera a “target” like a sprig of parsley or something to focus on. Most cameras set exposure and focus when you push the button 1/2 way down and actually take the picture when you depress the button the rest of the way. If you don’t want the “target” in the picture, push the button 1/2 way down and then, without moving the camera, remove the “target” and depress the button the rest of the way to take the picture. The camera will remember the focus and exposure setting as long as you don’t release the button before you shoot.
12. Consider adding things into the background to show scale if you’re doing a close-up shot of something that can take all different sizes (fruit, cookies, cupcakes, etc.).
13. Make your plate visually appealing and take the extra time to clean up any drips or spills, unless they look attractive!
14. If you really want to take pictures of your food, practice a little before you go on food at home. Food is difficult to shoot and no need to make a spectacle in the restaurant. Not everybody is as passionate about their food as AJ! (Thanks, Dad!)
Do you have some tips to add from your own experience? Let us know in the comments section below!! I’m always excited to learn!









 Our handy (and portable!) ebook guides make sure you get the best deals and can plan a vacation of a lifetime.

I love this post. I like to take pics of my food for Trip Reports, and will make use of your tips on our next trip!
You covered them all! I’ve always taken pictures of my food….Disney or out of Disney!
I purchased my most recent camera because of its cuisine setting! I actually don’t even use it as much as I thought—my “available light” setting covers most shots I take–it takes pictures without a flash, and takes them quickly so there’s no blur.
My favorite tips, which you already included, are using a tripod and putting the camera on delay, and not being afraid of using macro.
If I had to add one tip, I’d say to take a picture of the food with some sort of object that shows where you’re eating in the background, slightly blurred (this can be done on a regular point and shoot by using the macro setting or the portrait setting). I have a great picture of a frozen banana with the castle blurred in the background, food and wine festival food with the country blurred in the background, etc.
Great article!
Great info. Thanks!
Great post!! Thanks for the tips. Sometimes its just so hard to make food look appealing even if it tastes really really good.
To me your tip #9 is the most important for all photography. A friend recently sent me a shot of his family standing in front of the Washington monument; and he managed to include the entire monument! His family were four little dots at it’s base. Unless you are Ansel Adams, stay close especially with people, and of course good looking plates of food at WDW.
I like to use a fork and a napkin to style food shots. A fork, in particular, can make a picture really pop!
Are you accepting reports on Food and Wine Special Events from readers?
I love the cuisine setting on my camera – between that and lots of practice over the last few years our food porn has improved noticeably! Great post and great tips, AJ!!
Great tips–food photography can be addicting!
Love this article, AJ! I work for a restaurant, so I’ve done a lot of food photos. #13 is an interesting point. I just read an article the other day (in an restaurant industry publication) that talked about how the trend now in food photography is to not have perfection in the shot. The perfect plate presentation is perceived as fake. Little drips and such just add to the YUM factor! 🙂
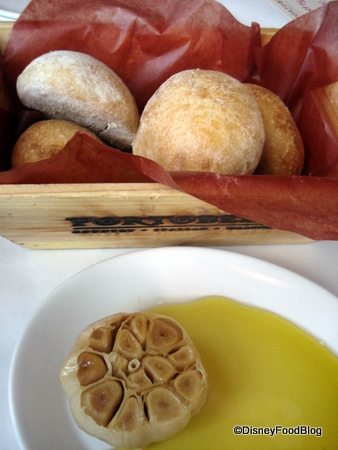
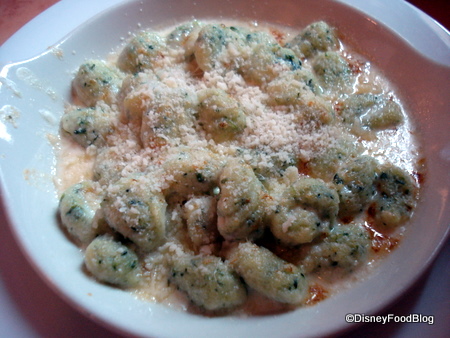
Okay, great article, but where were these photos taken? Lusting after the rolls and gnocchi in particular!
I do plan to use these tips to try taking food photos on our next WDW trip. Thanks!
Where was this post BEFORE my vacation? Oh well. I guess I did my best. 😉
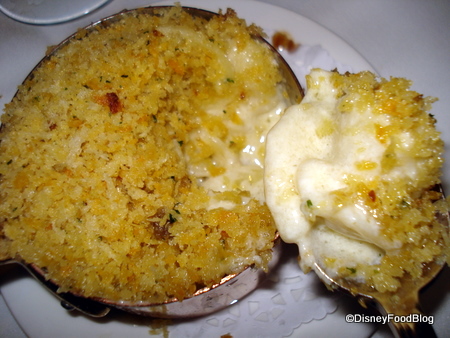
I REALLY want that mac & cheese. That point aside, I just wanted to mention that my Kodak (it’s the high end point & shoot for those of us who don’t want to lug camera equipment around but still want great photos) has a close up floral setting and a text setting – both of which I’ve found make excellent food photographs – in case it’s helpful to anyone.
Great article! #5 is very helpful. On our last WDW trip, we visited Yak & Yeti twice. The second time, we happened to get a table by the window and the photos from that meal came out just beautifully. The ones from the other meal weren’t bad, but the ones with natural light were noticeably better!
I would have to say that lighting is truly key, no matter what you are taking a picture of as it gives the mood and setting of the area.
People always tell me that I need to use a tripod, as I don’t have the most steady hand (I am working on it though–but no one is perfect) so that is another must. As of lately, I have seen a TON of electronic stores having sales on Mini-tripods which look like a great thing to carry around in a backpack or something.
Just out of curiosity AJ, what type of camera do you have? I have been looking into getting a Nikon CoolPix S60 (the touch screen one) as it looks amazing. Thanks!
Love these tips!!