’Tis the season for ornaments and sweater weather and gingerbread galore!
There’s a LOT to feel joyous about this time of year, and one surefire way to add a little magic to your merriment is with a few Disney DIY holiday hacks!
Christmas is a fun time for crafting! Whether it’s gift wrap, ornaments, or wreaths, the decor options are ENDLESS!
Of course, getting crafty is especially fun when it’s Disney-themed! And just in time for all the happy holiday hoopla, Disney is here with four AMAZING DIY ideas!
Mickey Yarn Present Toppers
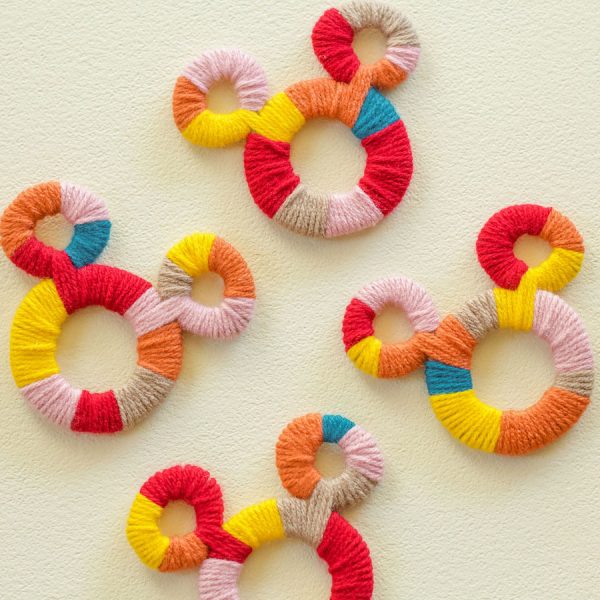
The first is a guide to Mickey yarn present-toppers, which are the CUTEST way to polish off a gift!
Materials:
- Yarn (in various colors)
- Cardboard
- Scissors
- Craft Knife
- Pen
- Hot Glue
Instructions:
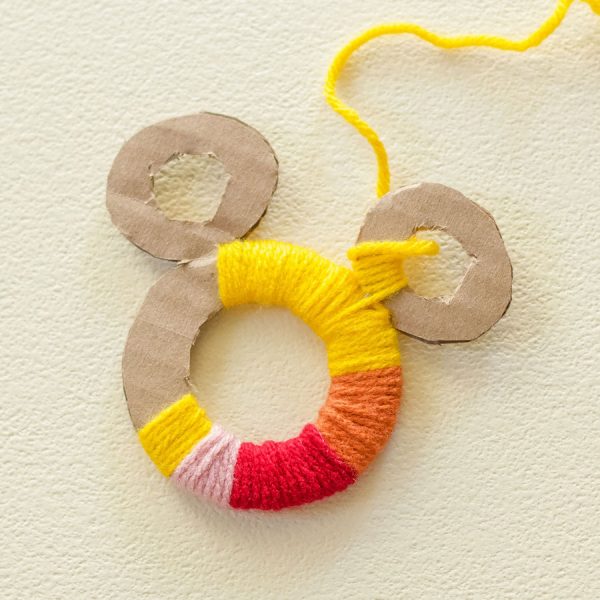
- Cut out the Mickey template and use it to trace onto the cardboard. Repeat for as many tags as you need.
- Use your pen to draw circles on the inside of Mickey’s head and each ear.
- You may need to use a craft knife to cut out the inside circles if you are not able to get them with your scissors. Cut out these circles, then cut out the Mickey shape. It’s okay if the edges are rough! It will all be covered by yarn.
- Choose your first color of yarn and cut a piece about 12 inches long. Designate one side of your Mickey shape as the back and one as the front. Glue one end of the yarn onto the back, then start wrapping! Glue the other end down when you get to the end and start a new color.
- Wrap up your gifts, then use yarn as ribbon. To attach the Mickeys, I like to thread the yarn through a loop in the back or glue it right onto the top so that they aren’t covered at all by the rest of the yarn.
The only problem is these present-toppers look SO PRETTY that you almost don’t even want to open the wrapping!
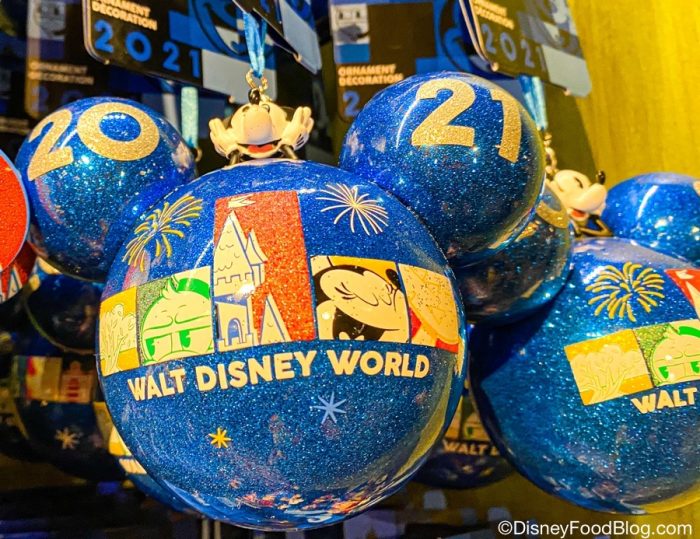
See some gorgeous ornaments from Disney World
Princess Tiana Wreath
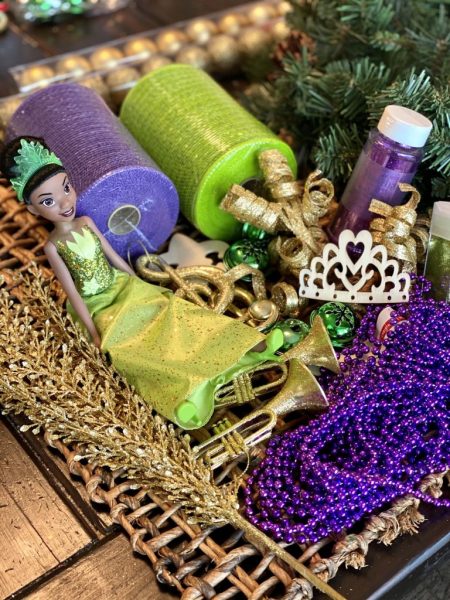
Next up is a gorgeous Princess Tiana Wreath! If you’re like us, the EPIC Christmas trees at Disney World have inspired us to step up our decor game at home, and this princess wreath is the PERFECT way!
Materials:
- Plain Wreath
- Mesh Ribbon in purple and green
- Ornaments and pick sticks
- Princess Tiana Doll
- Spray Mod Podge
- Glitter (optional)
- Gold Wire
Instructions:
- Lay out all materials.
- Cut hanging strings off ornaments.
- Set a few of the ornaments aside that you want to add glitter to. Spray with Mod Podge and sprinkle with glitter over a paper plate. Sit to side and let dry.
- Flip over the wreath and start feeding the mesh ribbon (1 color at a time) through the back of the wreath. You will be creating loops of the ribbon that will show from the front of wreath.
- Once you put both colors of mesh ribbon on wreath, it’s time to start filling it in with ornaments.
- Use the gold wire to wrap ornaments on wreath.
- Add the doll to your desired position. Use wire around doll waist to secure it.
- Continue to fill in ornaments and pick sticks.
- Optional: Print a picture of Prince Naveen as a frog and add it to wreath. Hang & enjoy!
Glitter is deemed “optional,” but as far as we’re concerned, glitter is ALWAYS essential.
Learn about the Princess and the Frog Splash Mountain retheme
Mickey Gingerbread Ornament
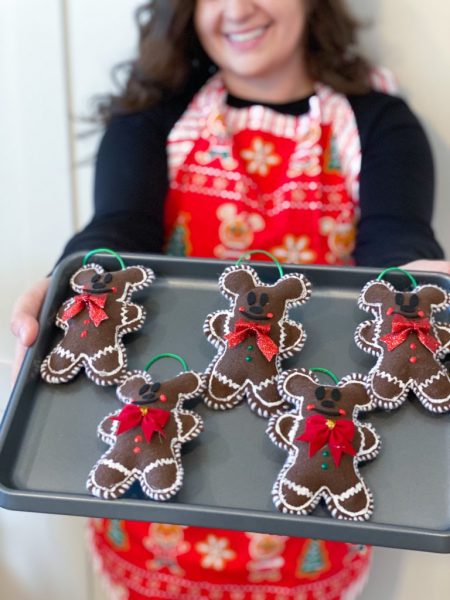
Now it’s tree-decorating time! And since we’re OBSESSED with all things gingerbread, what better way to bedazzle the tree than with a Mickey Gingerbread Ornament?!
Materials:
- Gingerbread Mickey Template
- 1 – 9×12 sheet of brown felt
- 1 – 9×12 sheet of black felt
- 1 – yard of white yarn ribbon
- Puffy paint (white, green, and red)
- Polyfill
- Big eye needle
- Scissors
- Marker
- Glue gun
Instructions:
- Using your marker, trace two Gingerbread Mickeys using your exterior stencil on the brown felt. Carefully cut out each Gingerbread Mickey.
- Place the Gingerbread Mickey interior stencil on one of your Gingerbread men and trace around the outline with white pu y paint. Add paint squiggles on the arms and legs of the Gingerbread Mickey, let dry.
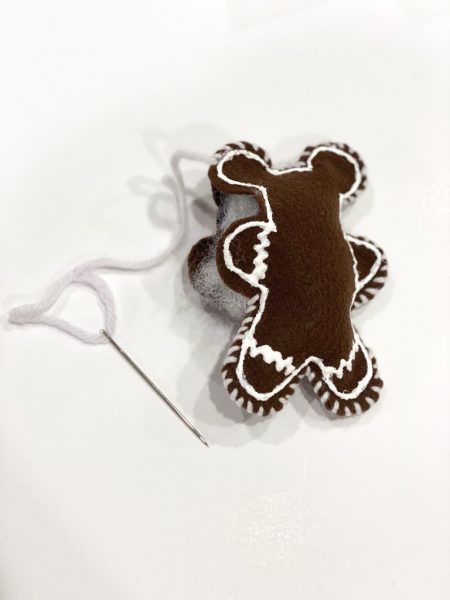
- Once your Gingerbread Mickey is dry, place it on top of your second Gingerbread Mickey. Using your needle and white yarn, carefully sew your two Gingerbread Mickeys together with a whipstitch. Before completely stitching up the Gingerbread Mickey, stuff with polyfill.
- Using your Mickey face stencil, carefully trace Mickey’s face onto your black felt and cut the face out. Hot glue the eyes, nose, and mouth onto your Gingerbread Mickey.
- Now it’s time to decorate! Using your pu y paint and ribbon, add buttons, rosy cheeks, and a bow tie (or a hair bow if you want a Gingerbread Minnie).
- Hot glue a looped ribbon on the back of your Gingerbread Mickey so that it can hang on your Christmas Tree!
There’s no baking involved with this gingerbread, though. Rather, you’ll just need felt, white yarn ribbon, Puffy paint, polyfill, a big eye needle, scissors, marker, and glue gun, and you’ll be well on your way to sweet Christmas tree success!
Read our reviews of ALL the holiday treats in Disney World this year
Holiday Sweater
With your presents wrapped, your wreaths hung, your tree adorned, and your halls FULLY decked, it’s time to sit back and get cozy! And that means SWEATERS!
Even Figment loves a holiday sweater!
Don’t worry, it’s not as intimidating as it may sound! You’re not sewing your own sweater from scratch! Instead, fashion influencer Margot from Disneyland Paris provides a fun tutorial for how to decorate sweaters for the season, and give your garb a Christmas tree-inspired makeover!
As we all count down the days to Christmas, there’s no better time to get crafty and cozy with these DIY Disney activities!
Cozy up with more sweaters at Disney World!
Join the DFB Newsletter to get all the breaking news right in your inbox! Click here to Subscribe!
WE KNOW DISNEY.
YOU CAN, TOO.
Oh boy, planning a Disney trip can be quite the adventure, and we totally get it! But fear not, dear friends, we compiled EVERYTHING you need (and the things to avoid!) to plan the ULTIMATE Disney vacation.
Whether you're a rookie or a seasoned pro, our insider tips and tricks will have you exploring the parks like never before. So come along with us, and get planning your most magical vacation ever!
What do you think of these DIY Disney Christmas ideas? Let us know in the comments!




 Our handy (and portable!) ebook guides make sure you get the best deals and can plan a vacation of a lifetime.

TRENDING NOW
There are a lot of changes happening at Disney World in the coming years, but...
If you plan on visiting Disney World parks on your arrival day, read this!
Card Members should jump on this offer quickly.
A new streaming option on Disney+ will allow accounts to "pause."
We stopped by Jock Lindsey's Hangar Bar to check out the new holiday offerings, and...
Lightning Lane Premier Pass is SOLD OUT for two of Disney World's theme parks.
Planning a Disney World trip for 2025? If you're thinking of staying at a Disney...
Disney World restaurants are changing -- here's how!
Construction continues on this project in Adventureland, and we've got some interesting proof it's likely...
These Disney essentials on Amazon are PERFECT for the holiday season!
These are the worst Disney World hotels for you to choose from for your 2025...
There are a couple of things, a couple of obscure things that we do every...
Big Thunder Mountain's upcoming closure could affect all of Magic Kingdom.
Lightning Lane prices are about to skyrocket in Disney World and we've got all the...
Since you're getting ready for your next Disney World trip, here are 7 items you...
Disney has just dropped some BIG updates -- get them all here!
Disney just released Lizzie McGuire-themed shoes and we are OBSESSED.
We're sharing our secret to getting the best deals this holiday season on Amazon.
Looking to treat yourself to celebrate Mickey and Minnie's birthday? Check out some of our...
We've tried breakfast, lunch, dinner, and the bakery at The Cake Bake Shop and shared...