Please welcome guest author Tom Bricker, photographer extraordinaire, to the DFB! He and his wife, Sarah, operate DisneyTouristBlog.com, a website featuring accounts of their adventures at Walt Disney World and Disneyland. I’ve LONG been a fan of Tom’s photography, so I’m so honored to have his expertise on the blog. Now, let me get my pen so I can start taking notes…
Photographing food at the Disney theme parks can be tricky. If you’ve ever taken a photo of your plate of food and looked at the LCD screen to find a blurry photo with odd colors, you know this.
The low and uneven lighting in many Disney restaurants can wreak havoc on a camera’s sensor, and bland composition can further reduce the visual appeal of food photos — even when the dishes photographed are especially mouth-watering! However, with just a few small changes to how you photograph food, you can achieve much better results. Here are my tips to producing visually delicious food photos:
Considering Photo Composition
Regardless of whether you’re using a DSLR or a point & shoot camera, composition is extremely important. It may sound funny to think of composition when photographing food; after all, it’s just a plate of food, right? How many different ways are there to photograph a plate of food?! Surprisingly, there are a lot of different ways, and the way you choose can make a huge difference in the quality of the resulting photo.
Many people take photos from directly overhead, capturing the entire dish in an illustrative manner that simply highlights what’s on their plate. If you’re writing a trip report or you just want your viewer to be able to see everything on your plate, there’s nothing wrong with this type of shot. It’s not my personal preference as I think it looks a little boring, but I do understand the rationale for taking photos like this. Here’s an example:
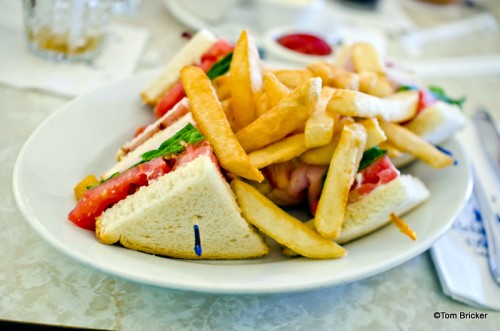
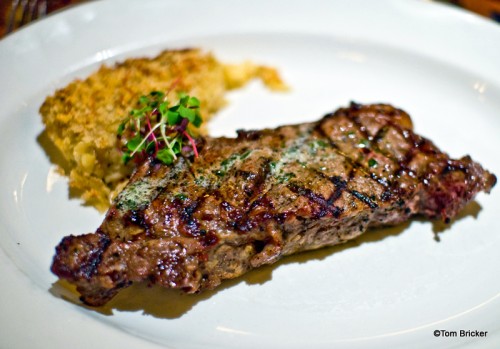
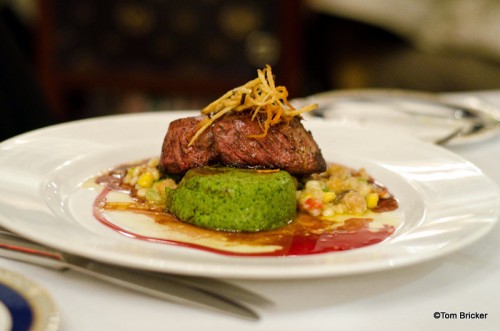
Pretty straightforward, and clearly shows everything on the plate. Yet, it’s a little “meh” to look at. My preference for basic shots is photographing at around a 45 degree angle, which is basically how you see the food when you’re seated at the table. Here are examples:
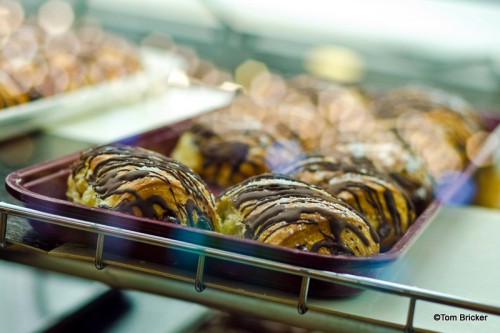
However, don’t stop there! Experiment! After you get that illustrative shot, try a more artistic composition to compliment that shot, zooming in to focus on certain portions of the plate, or making only a small area of the food in focus.
I recommend taking this type of shot to supplement your other illustrative photo, rather than in place of the illustrative photo. After all, you don’t want a bunch of abstract-looking photos that don’t show what exactly is on your plate! Take an establishing shot to show the food first, then you can get a little crazy with other types of more artistic shots.
Using Point & Shoot Cameras
If you’re using a point & shoot camera to photograph food, you have a bit of an uphill battle; but fear not, as good food photos are still possible!
Experiment with Manual Settings
If you’re comfortable using some manual settings, and you’re photographing food indoors, I recommend using aperture priority mode (labeled “Av” or “A” on camera setting dials). This will allow you to manually set the aperture (how much light is allowed in while the photo is being taken) while the camera chooses an appropriate shutter speed.
Indoors, consider a high ISO setting (usually between 400-800) and lower aperture number (like f/2.8, as opposed to a higher number like f/10 — the lower the number, the more light is allowed in while the photo is being taken). Hopefully, this will give you a shutter speed of at least 1/20th of a second.
If you’re photographing food outside in bright or normal midday lighting, auto-mode should be fine. If you’re scratching your head right now, wondering what the heck these settings mean, you’re probably fine just staying in auto-mode no matter what the circumstances.
Macro Mode
The next thing to try is putting your camera into macro mode. On many cameras, the macro setting icon will look like a little red flower. If you see no red flower on your menus and you can’t otherwise find the macro setting, consult your owner’s manual, as almost all point & shoot cameras have a macro mode.
If you’ve ever seen or taken a food photo where the food is out of focus and objects behind the food are in focus, it is due to the photographer getting too close to the food and not selecting macro mode. Don’t make this mistake! Using macro mode is the easiest way to photograph food from your seat. As with many things, though, the easiest way isn’t necessarily the best.
It may seem counter-intuitive, but you will actually achieve better food photos if you don’t enable macro mode, but instead move farther away from your food and use your optical zoom (never use digital zoom) to get a close up photo of your food.
The reason for doing this is two-fold:
- First, using zoom causes something called “perspective compression,” which makes the distance between objects on the plate appear smaller.
- Second, it decreases “depth of field,” which is the area of the photo that is in focus. Most photographers consider food photos with a “shallow” depth of field, so that only part of the food is in focus, to be more visually pleasing and less visually “busy” than photos that have the entire plate in focus.
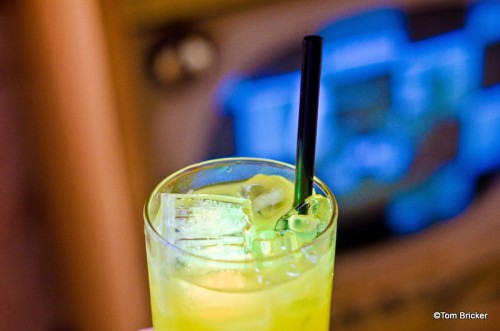
If you’re going for photos that are more illustrative of what’s on your plate than photos that are supposedly visually pleasing, you may not want this look for your photos. Below are examples of perspective compression and shallow depth of field to give you an idea of what these terms look like in practice.
The problem with moving back and using more zoom is that it’s not always practical. Sure, if you’re eating outside at a quick service restaurant with few people around, like in the secluded area at Hungry Bear Restaurant, it’s no problem. However, in a more refined setting where tables are close, such as in the dining area at Le Cellier, it may be frowned upon by fellow patrons if you’re backing your rear-end into their table as you try to get “just a little more perspective compression!”
Using Your Flash
Le Cellier presents a good segue into another aspect of food photography with a point & shoot: flash. My personal preference is to not use flash for photos of food.
That said, with a point & shoot camera, you may have no other choice if you want to get a good photo, especially in poorly lit restaurants, such as the aforementioned Le Cellier. If you’re going to use a flash, I highly recommend using the “zoom and move backwards” technique, as this will reduce the intensity of the flash on your photo.
If you use the macro setting, and stay close to your food while using the flash, you’re much more likely to wash out the colors of your food or give the food a ghost-white appearance.
Using DSLR Cameras
When using a DSLR camera to photograph food, your best option is to select a lens like the 50mm f/1.8. I mention this lens because it’s inexpensive and many people have it, but other similar lenses will also work.
Using a fixed focal length (“prime”) lens like this allows you to use a lower f/stop number (that means that more light will be allowed into the camera during the photo — back to aperture!) that will allow for better low-light photos, and will also give you a more shallow depth of field.
Use settings similar to those mentioned in the Point & Shoot section above, and also avoid using the flash if you can. I usually avoid shooting “wide open” at f/1.8 (the lowest aperture setting), as I think the depth of field is a little too shallow at that setting. Test and experiment with what apertures work for your photos. I like to stay in the range of f/2.8 to f/5. Likewise, you should move back from the food rather than getting as close to it as possible.
Post Processing: Making Your Photos Delicious
Few photos look perfect straight out of the camera, and food photos are no exception — especially if you’re taking them indoors in oddly-lit Disney restaurants without flash.
You may notice that your photos have odd colors straight out of the camera (see below; notice the red hue to the photo?), but this can be easily fixed by adjusting the white balance in most photo editing programs.
If you don’t have a photo editing program or don’t want to use one, you will probably want to use your flash when photographing food after all. It will overpower the odd lighting found in Disney restaurants, giving you a properly-colored (albeit slightly washed out) photo straight out of the camera.
Final Thoughts
All of these settings might seem like a lot to digest (ahh, gotta love lame food puns!), but once you pick up the camera and apply these tips to your food photography, you’ll find it really isn’t that complicated to get good food photos.
If you have trouble mastering the manual settings presented here, there’s nothing wrong with sticking in auto mode. There’s also nothing wrong with practicing taking food photos at home, so you aren’t scrambling trying to apply these suggestions to real world application once you’re on vacation!
It’s also important to remember that these suggestions are just that — suggestions. You might find that you don’t like the results achieved by these suggestions, in which case you should try other techniques. Ultimately, only your opinion of your photos matters, so make sure you’re taking ones that you like!
Have you ever joined our ranks in taking photos of your food? Let us know your best tips and tricks in the comments section below!










 Our handy (and portable!) ebook guides make sure you get the best deals and can plan a vacation of a lifetime.
I think we all struggle at times to capture the perfect photo to go along with those delicious memories from Disney mealtimes. This is an excellent post! Thank you for sharing your expertise!
The next best thing to eating food is looking at pictures of food, and the next best thing to being in a Disney park is reading about Tom and Sarah being in a Disney park! It was a pleasure, therefore, to wake up this morning and fine Tom featured on the Disney Food blog. I look at numerous Disney websites with some frequency, but the only two that I look at absolutely every day are this site and that of Tom and Sarah. Both represent the highest quality blogging on the subject of the Disney parks, and it’s a great pleasure to see the cross-over. Tom is becoming well-known for his photographic talents, but I would also commend his prose style, which is highly engaging and, most of all, often quite humorous. In a world of bloggers who frequently take Disney far too seriously, this lighter touch is most refreshing.
Writing good food reviews and taking good pictures require the same talents. They require the reviewer or the photographer to describe things that other people simply do not see (or taste). As I’m sure you know, many people just eat, putting the food into their mouths without any sense of the “finer points” of the experience. The same is true of photography, where many just point the camera and snap the picture without regard for even such basics as composition. In short, most people go through life without really seeing or appreciating what is around them, and the food critic and photographer are instrumental in changing that, in helping people to see anew and appreciate what they might otherwise have neglected to notice. This is the basis of all art: seeing in a new way what others don’t see at all.
Thanks for providing us with such a quality experience on both blogs.
Thank you for this! I am an amateur food photographer and this was SO helpful! Your article will help improve my pics for the future!!
Great article Tom! I don’t have a DSLR camera but I have a pretty nice point and shoot. The limited or non-use of flash is a great tip. Flash, up close, always washes out the food and white plates practically glow and overpower their contents. I also loved the tip on the 45 degree angle, I’m been doing that instinctively. I need to dig in deeper with my manual settings to push my camera to the limit. Guess I need to research-up on all the aperture and f/stop stuff. Thanks again for sharing all your tips!
Thanks so much for sharing this info! It is very helpful!
Tom Bricker for president!
Great post Tom, love learning photo tips
Thanks for the kind words, everyone. If you have any questions, leave them in the comments. I’ll be checking in periodically and am happy to help with further advice/explanation.
My Panasonic Lumix point-and-shoot has a Food mode, and it worked great taking pictures of Disney meals.
I’m going to echo the praise for Tom. I’m a big fan. Great post!
I’ve generally had good luck with my DSLR and food photos, but I don’t always want to carry around that beast, especially at more formal dining experiences. (SLR doesn’t fit into a cute clutch.) I had quite poor luck with point-and-shoot cameras until I found a really good one. The Canon PowerShot S95 is exceptional at taking quality shots without a flash in low light situations – a typical restaurant situation.
I’m not pushing Canon, but I think it does bear mentioning that not all point-and-shoots are the same. I think it pays to do a bit of research to find one that best suited to your needs.
Loved this post, Tom! Photography is one of my many hobbies, but I haven’t invested in a DSLR yet. My digital camera is a point-and-shoot and my SLR is film (behind the times, but I love working in a dark room.) So I really appreciated the tips for shooting with a point-and-shoot. After doing it for so long, I get some pretty good shots, but my photos can definitely improve. I look forward to taking your tips and putting them to work.
I don’t tend to have brand loyalty (since brand isn’t everything) and I do very extensive research before buying cameras (well actually anything really). The last 3 cameras I have bought have all coincidentally been Canon though.
Thank you so much for this article! I printed it out and will help me immensely when photographing food for my blog. I have come a long way but not nearly good enough yet. Thanks again!
Thanks so much for these great tips! I got a 50mm f/1.8 lens for Mother’s Day and can’t wait to use it for taking food photos on our Disney trip in December. Frankly, I might not have thought to take the extra lens with me for that purpose, so I appreciate the advice!
Your photos are gorgeous. I want to be you when I grow up. 😀
@Erin – The S95 the point & shoot camera I recommend. It has incredible low light performance for a P&S camera, which at least partly explains your success. Of course, as with all photography, the camera matters less than the person using it!
Here’s my full list of P&S recommendations if the S95 (about $350 at Amazon) is too expensive: http://www.disneytouristblog.com/best-point-and-shoot-camera-reviews/
Thank you for the tips. I have a cuisine setting on my camera that I use when I remember it’s there.
Any tips for those of us using an iPhone? (gasp!) I find it does the job pretty well, especially with the Camera+ app…
@The World of Deej – use the advice found in the P&S and composition tips sections. Also, whenever possible, take your photos in well-lit areas, and without the flash.
For our trip to the World next week, I’ll be trying my hand at taking stereoscopic pictures. This is just with my cellphone, but it should be a fun challenge! I’ll try to keep these tips in mind.