MagicBands can be incredibly useful. You can link your ticket to them and simply use it to scan into the theme parks. You can also use them to pay for items in the parks or even get into your hotel room. But, did you know you can make your MagicBand control your iPhone?
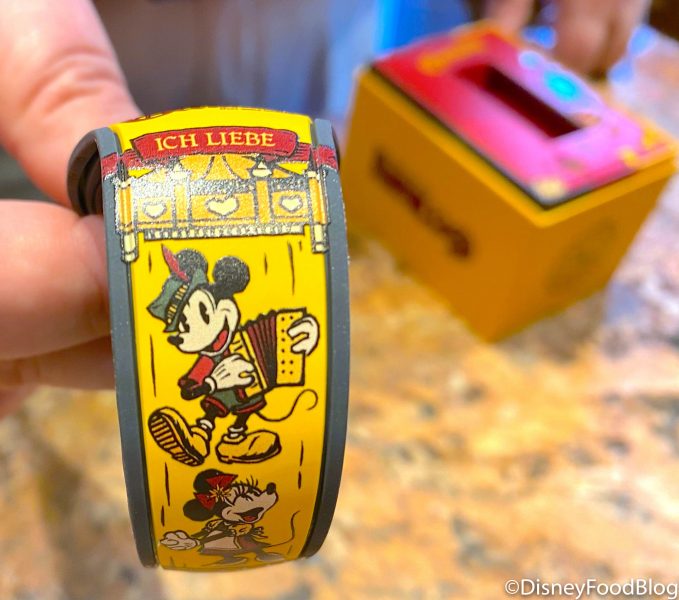
Germany MagicBand
It’s true! We’re sharing a step-by-step guide with you today so you can add a little magic to your iPhone experience. You’re wearing your MagicBand at home to feel like you’re in Disney World anyway, why not make it functional too?
Okay, so maybe you’re not wearing your MagicBand at home (although we totally get it if you are). But, you could also use this cool tech trick in the parks for some added convenience. We spotted this AWESOME tip over at Attractions Magazine, and just had to try it out for ourselves. Basically, what this does is allows you to tap your MagicBand to your iPhone and specify some kind of response that will happen as a result — for example, you could have your phone play a Disney song or open a Disney website every time you tap you iPhone to it.
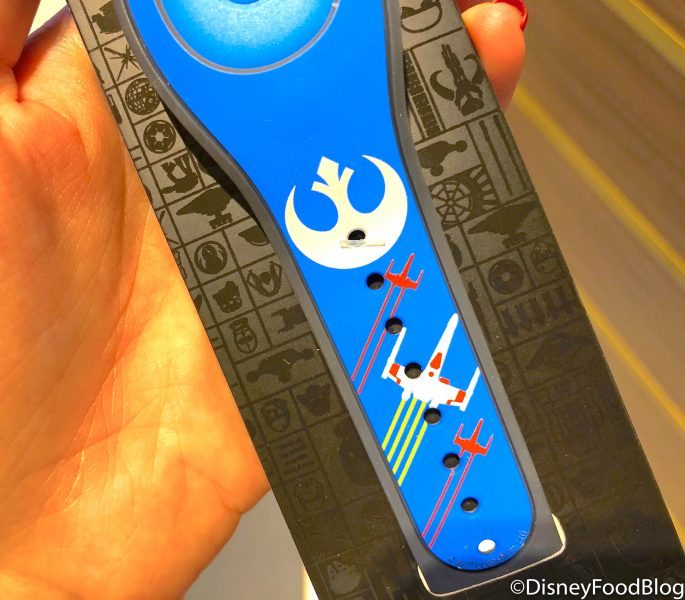
Resistance MagicBand
Attractions Magazine points out that this only works, however, if you have an iPhone 6 or newer, and your phone is running IOS 14.1 or newer software. Okay, once you’ve got that squared away, you can get to work!
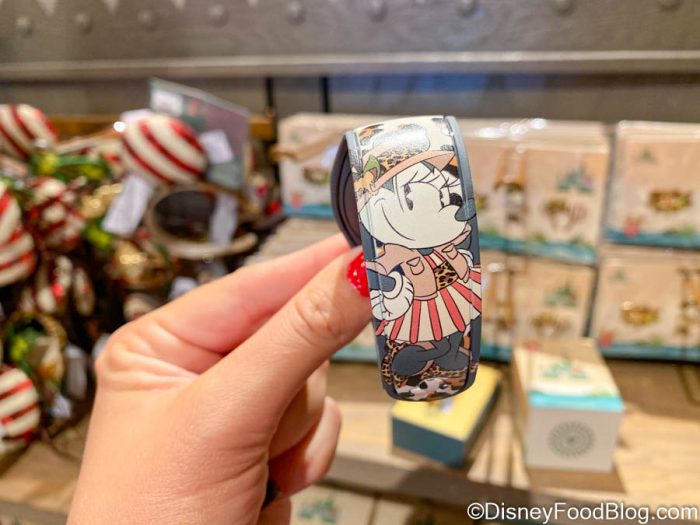
Jungle Cruise MagicBand
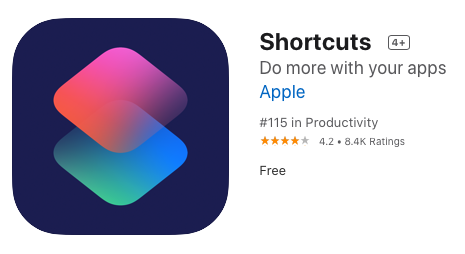
1. Download Apple’s Shortcuts App
First, you’ll want to open up your iPhone and download Apple’s free Shortcuts App. Attractions Magazine notes that this app is safe to use and does not require you to jailbreak your phone or anything like that, so that should not be a concern at all.
©Apple
2. Personal Automation
Once you’ve downloaded the app, you’ll want to open it, and you’ll see a screen that looks like this.
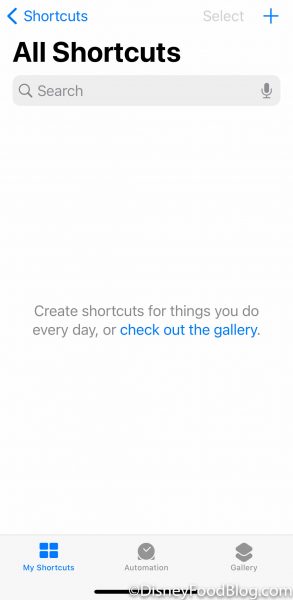
Screenshot from Shortcuts App
On the bottom you’ll see three selections — My Shortcuts, Automation, and Gallery. Go ahead and tap “Automation.” That’ll take you to a screen that looks like this.
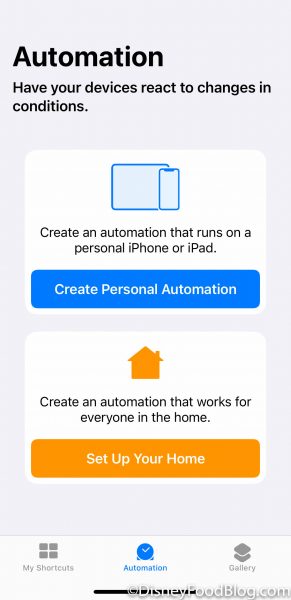
Screenshot from Shortcuts App
Then, hit the blue “Create Personal Automation” option.
3. Select NFC
That will take you to another screen where you’ll want to scroll down until you see something titled “NFC.” It’s just below Wi-Fi and Bluetooth.
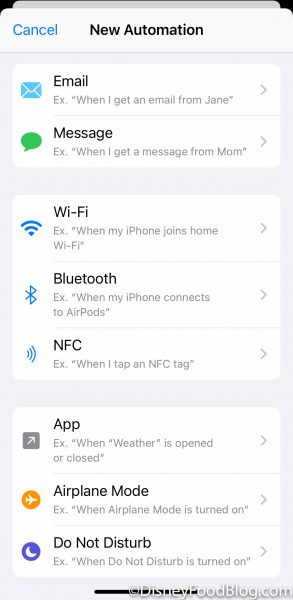
Screenshot from Shortcuts App
That will take you to this screen. What you want to do is tap the Scan option.
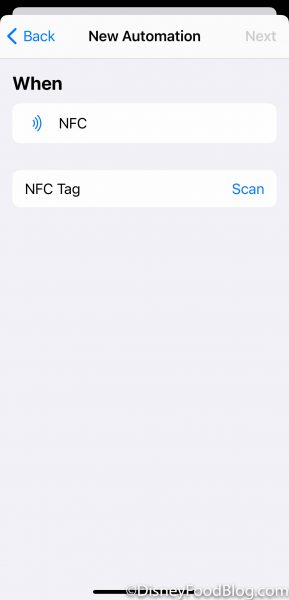
Screenshot from Shortcuts App
4. Scan Your MagicBand
This screen will then appear telling you to hold your device near the NFC tag. At this point, you’ll need to grab out one of your (many) MagicBands. Gently place the center puck with the Mickey on it on the top of your phone, like where the selfie camera is.
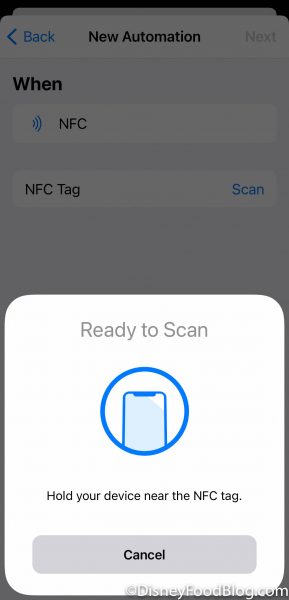
Screenshot from Shortcuts App
If you’re successful at scanning your band, you’ll see this screen pop up asking you to name your tag. You can name it MagicBand or anything else you’d like.
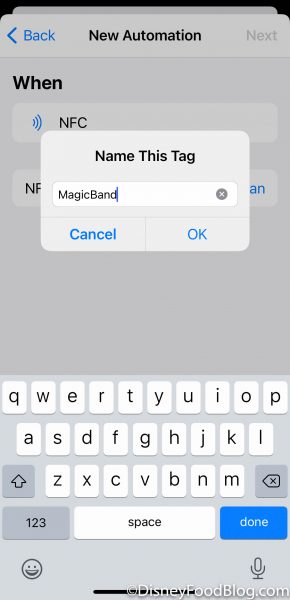
Screenshot from Shortcuts App
Then, you should see this screen with the name of your “tag” next to NFC Tag. Now, here’s where things get FUN! Hit the next option…
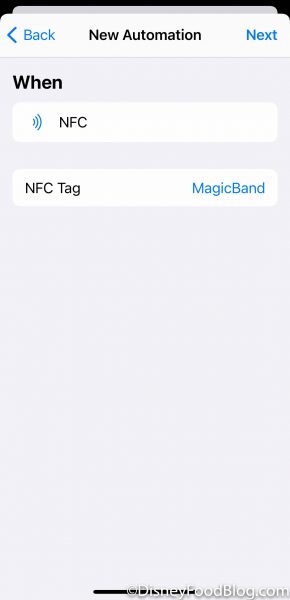
Screenshot from Shortcuts App
…and you’ll see this screen telling you to add an action.
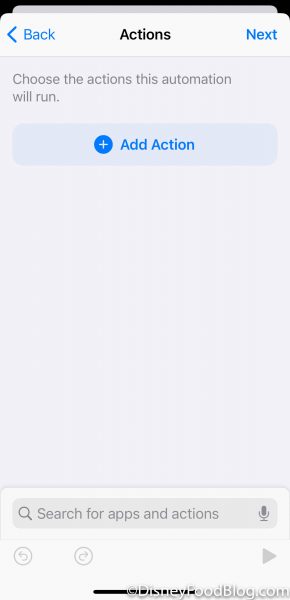
Screenshot from Shortcuts App
5. Add an Action
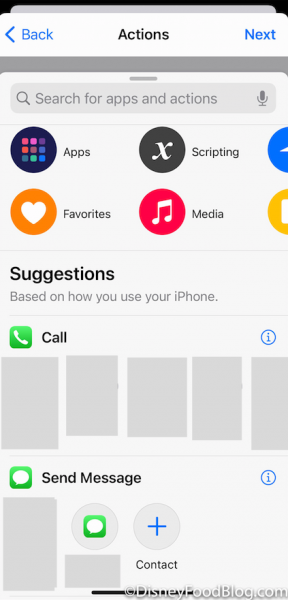
Go ahead and tap “add action” and you’ll find yourself on this screen with a LOT of options! You can specify that every time you tap your MagicBand to your iPhone (in that same upper spot near the selfie camera) your phone will play a song, call a friend, open an app, open a website, or tons of other things!
Screenshot from Shortcuts App
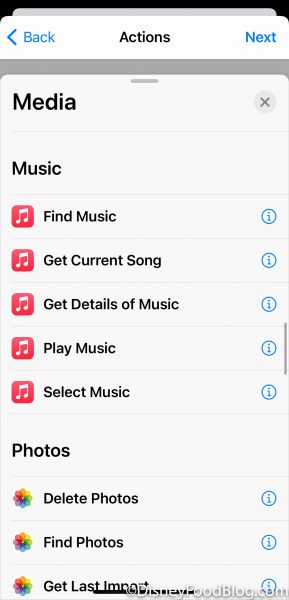
Let’s test out making your iPhone play a Disney song with just a tap of your MagicBand. First, you’ll want to select “Media” from the list on the top. That will take you to another page and you’ll want to scroll down to where it says “Play Music” to have it play a song that’s on your iPhone.
Screenshot from Shortcuts App
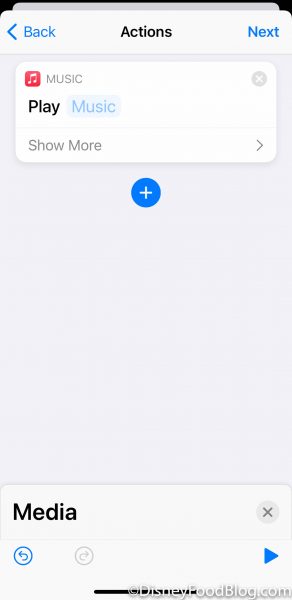
You’ll then get this screen. To specify what song you want it to play, tap the light blue word “Music”…
Screenshot from Shortcuts App
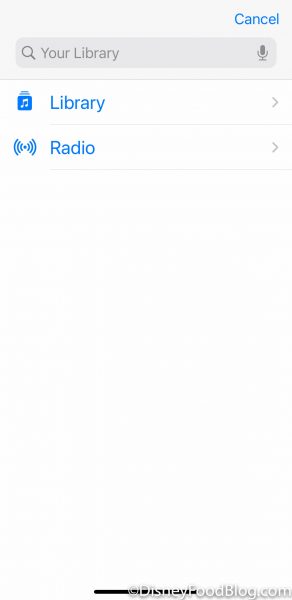
…then select “Library”…
Screenshot from Shortcuts App
…then you can go through your library and pick whatever song you want. We chose “A Dream is a Wish Your Heart Makes” from Disney Mania 4 — a true classic.
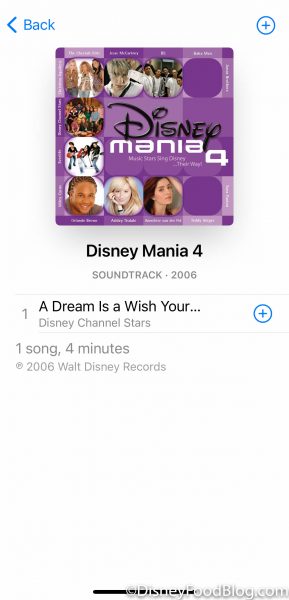
Screenshot from iPhone
Then, you’ll get to a screen where it will confirm the song and you can edit some other details about how the song will play.
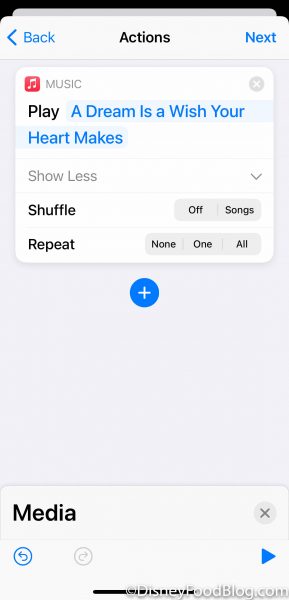
Screenshot from Shortcuts App
Hit next and the system will confirm that when your MagicBand is detected, the song will play. You can either force the App to ask you each time before playing the song, or you can toggle that green button to the “off” position so the music will play automatically.
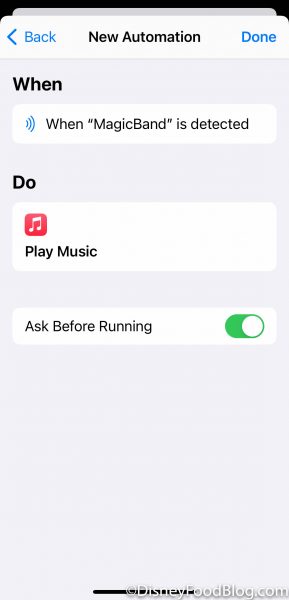
Screenshot from Shortcuts App
Hit “done” on the top right and you’re ready to go!
6. Test it Out!
The last step is to test it out! Place your MagicBand near the top detector and, if you chose to have the App ask you for permission before taking the action, you’ll see this screen.
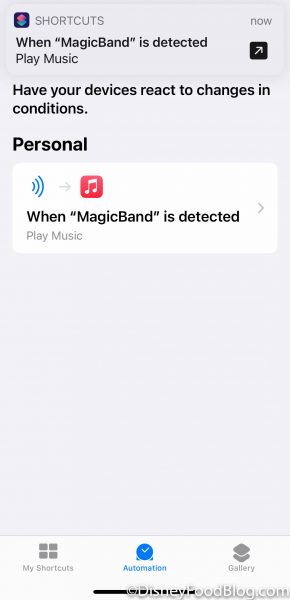
Screenshot from Shortcuts App
You’ll hit the banner at the top, and it will ask you for your permission to play the song. Allow it to run and…boom! Your music should start playing!!
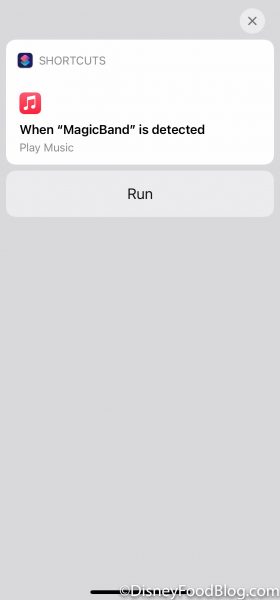
Screenshot from Shortcuts App
While randomly playing your favorite Disney songs may seem cute but not the most convenient thing, you can also use this function for much more!
For example, instead of adding a song function, you can specify that you want the App to open a webpage each time you tap your MagicBand, like www.MyDisneyExperience.com. To do this you’ll follow the same steps as above, except that instead of selecting “Media” as your action, you’ll select “Web.” Then, you’ll scroll to where it says “Show Web Page” and you’ll enter the webpage you want your phone to open. You can again specify if you want it to ask you for permission or not.
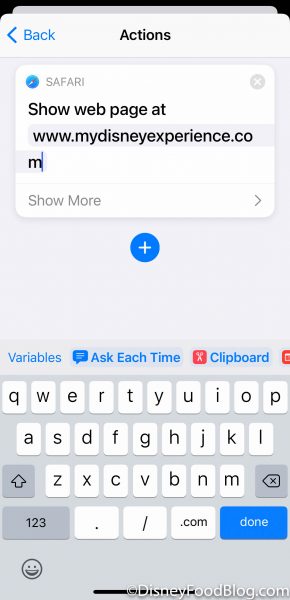
Screenshot from Shortcuts App
Then, you’ll see something like this.
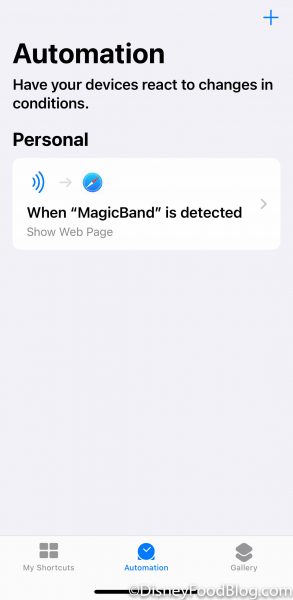
Screenshot from Shortcuts App
Scan your MagicBand, approve the action (if you set it up that way)…
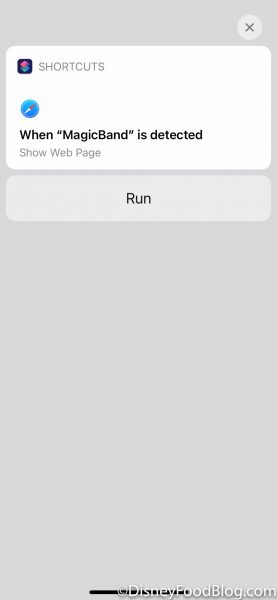
Screenshot from Shortcuts App
…and away you go! You can log in to My Disney Experience and check park hours or take other actions through the website, including making dining reservations.
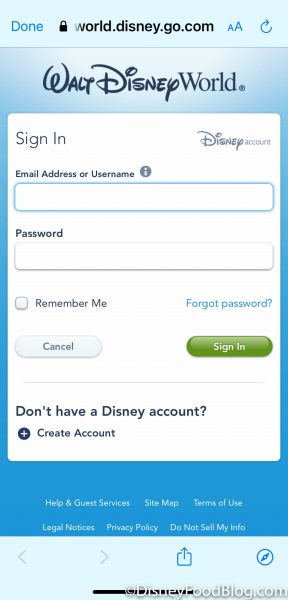
Screenshot from Shortcuts App
You can also program it to open Disney+ or a multitude of other things! What cool function will you be adding to your phone with this fun feature? Let us know in the comments below!
Click here to check out this NEW Toy Story MagicBand we found in Disney World!
Join the DFB Newsletter to get all the breaking news right in your inbox! Click here to Subscribe!
WE KNOW DISNEY.
YOU CAN, TOO.
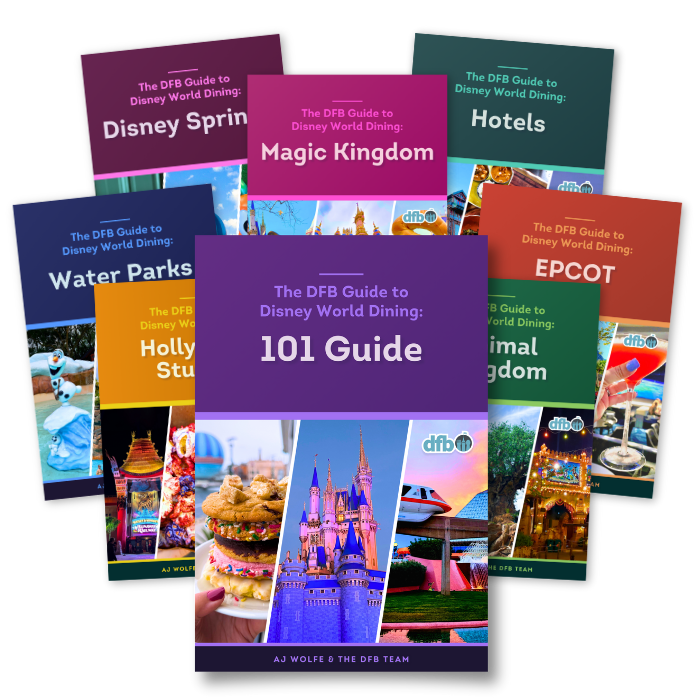
Oh boy, planning a Disney trip can be quite the adventure, and we totally get it! But fear not, dear friends, we compiled EVERYTHING you need (and the things to avoid!) to plan the ULTIMATE Disney vacation.
Whether you're a rookie or a seasoned pro, our insider tips and tricks will have you exploring the parks like never before. So come along with us, and get planning your most magical vacation ever!








 Our handy (and portable!) ebook guides make sure you get the best deals and can plan a vacation of a lifetime.

Very neat. But note there’s an error in the article (due to an error in their source). In order to use NFC shortcuts you need an iPhone XS or better. It will not work on “iPhone 6 or better”.
Wow!this is totally amazing!!
Unfortunately it isn’t working for me! I have iPhone X! Unless I’m doing something wrong which could be the case!
You can also choose “Scripting” and Open App “Disney World” instead of opening the web page and signing in every time.